
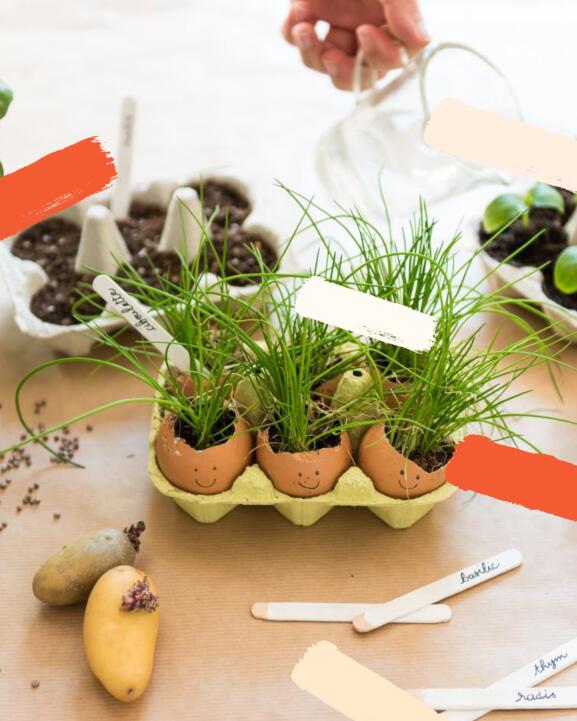
Gardening at home with your children
In the garden or on a windowsill, today your children will meet a family of shelled creatures, which will introduce them to everything that grows!

- String or twine, any thickness you like
- A pair of scissors
- A small pot about 12cm high
- Wooden beads for decoration (optional)
- Your favourite playlist
- A glass of wine


For a 50cm-high hanging, start by cutting three pieces of string, each 1.5m long. Fold them in half and tie them together with a large knot, leaving a loop that will act as a tie. Lay it out facing you on a flat surface, with the loop facing upwards, and spread out the 6 strings.
Isolate the two leftmost strings and tie them in a single knot about 30cm below the loop. Repeat the operation with the two strings in the centre, then with the two on the right. Take a sip from your glass of wine.
Follow the instructions below. About 15cm from the previous series of knots, take the right-hand string from the leftmost knot (read that again), and tie it with the left-hand string from the central knot. Then tie the right string of the central knot with the left string of the right knot. Finally, tie the two remaining strings (if you've been following along, you should have the left string of the left knot and the right string of the right knot remaining). Take a second sip of wine. You've done the hard part!
Finish your Sistine Chapel with a large knot 5cm lower down using all the strings. Trim any protruding ends to an even length. The idea is to leave at least as much length as you have between the loop and the first series of knots. The rest is a matter of personal taste.
Optional: You can add wooden beads under the hanging loop before tying it, or along the strings hanging under the pot, as long as you secure them with knots underneath, of course! In this case, use slightly longer strings.

Your suspension is ready for your pot! Finish your drink and congratulate yourself.

Now that you're almost done, why not decorate your pot with a homemade hessian planter? You don't have to be a first-rate seamstress to get a stunning result.
Measure the diameter and height of the pot, then draw a circle 2cm larger in diameter on the hessian (this will serve as the base). Multiply the diameter of this circle by 3.14 (don't panic, there’s no exam), which gives you the length of the side trim strip. The height of the rectangle is the height of the pot + 3cm to make a flap. Trace this rectangle on the canvas and cut out the pieces. Fold the rectangle of fabric in half lengthways, place pins about 0.5cm from the edge and sew. Assemble the rim of the pot with its base by sewing a 0.5cm border again. Turn it inside out to hide the seams. Finally, fold over the top edge by 2cm, secure with pins and sew.
And that's it!
In the garden or on a windowsill, today your children will meet a family of shelled creatures, which will introduce them to everything that grows!

Cherished by our grandmothers and the Egyptians, this plant that we love to brew for herbal tea is full of benefits for our body and hair!

Because anything and everything is being said about baby skincare, we'll help you out with some simple tips for soft skin.

When it comes to recycling, we all want to do the right thing, but it's not always clear! Some solutions to combat recycling anxiety.

Misfit or teacher’s pet? Knapweed and cornflower, two sides of the same plant to take care of the eyes and remove brassy tones from the hair
